

How To Install Garden Shed Windows
A garden shed isn’t complete without windows! These essential components bring in natural light and fresh air, all while adding an attractive aesthetic touch. If you want to install windows in your garden shed, let our guide provide the expert insight you need for a successful project. From gathering materials to completing the job – we have everything covered!
Gather Your Materials
All required materials must be acquired beforehand to install garden shed windows efficiently. To help guarantee a seamless project completion without any time-consuming delays, here is an itemised list of what must be obtained: Gathering all the necessary materials is important before installing a garden shed windows. This will ensure you have everything you need to finish the job without unnecessary delays. Here’s a breakdown of the materials you’ll need:
- Windows: Right off the bat, you’ll need to procure the actual windows. Since accuracy is critical, please measure your window opening precisely to obtain an appropriate size. Keep in mind investing in a window set-up that’s simple to mount and comes with all its mounting hardware. Good windows will also prevent future leaking.
- Screws: To ensure your windows stay firmly attached to their frame, find screws that are the proper length for both. Carefully select the right size of screw to avoid any unwanted movement or potential hazards down the road.
- Drill: To fasten the screws, creating pilot holes with a drill is critical.
- Saw: A saw is a must-have tool when trimming or framing any extra wood for the window opening. With it, you can craft your desired size with precision and accuracy!
- Tape Measure: To guarantee your window is the perfect fit, measuring is a critical step. You can use a tape measure for both the dimensions of the opening and that of your desired window to ensure it’s accurate.
- Caulk: It is essential to use a top-notch outdoor caulk to create an effective seal around the window frame. Investing in quality caulk will result in better protection and durability against all elements of nature.
- Insulation: Keep your garden shed cosy and draft-free using foam insulation to seal the window opening.
- Trim: Adding trim to your installation is unnecessary, but it can give everything an elegant and professional appearance. You can use a saw for cutting the edge to size and complete it with finishing nails for secure placement.
Before you start the installation process, please ensure all your tools and materials are available. Having everything ready to go will make the installation smoother and quicker. Also, could you take a few minutes to double-check your shopping lime before beginning the setup procedure?

Remove Old Windows (If Applicable)
Out with the old and in with the new! Replacing your garden shed’s windows is as straightforward a process as possible, so long as you have all of the necessary tools. Follow this step-by-step guide to getting started removing those pesky old windows quickly and safely:
- Protect yourself: Before you begin, please ensure you have protective gloves and eyewear to protect against any potential injury from shattered glass or scattered debris.
- Remove the window sash: To begin, carefully remove the window sash from its frame. Unscrew or unhinge any nails that are keeping it in place to do so.
- Remove the window frame: Now that the sash has been removed, it’s time to remove it with caution. Take out any screws or nails securing it in place while being careful not to harm either the frame or wall area surrounding it.
- Clean up debris: After the frame is detached, scraping away any left-over residue, sucleftoverking, na,ils and screws may be necessary. A putty knife or scraper can help remove these particles for a clean area.
- Dispose of the old window: Ethically disposing of the old window is essential. You can research and contact your local waste management facility to determine if they take glass windows. Alternatively, you can search for recyccentresnters in your area that accept glass materials.
Suppose you wish to substitute the windows of your shed safely; adhere to these steps. If any section appears mysterious or complex, feel free to seek assistance from an expert or request help.

Prepare Window Openings
Having removed all existing windows, it is time to ready the window openings for their brand-new replacements. These entryways must be correctly readied to fit impeccably and safely installed. To assist you with this process, here’s a detailed instruction guide:
- Measure the opening: Accurately gauge the length and width of your window opening using a tape measure. For best results, take multiple measurements in different spots to guarantee precision.
- Cut any excess wood or framing: Make precise cuts to any excess wood or framing with a saw to ensure that your extra opening is the right size. As you cut slowly and cautiously, please pay attention so as not to cause harm to the wall or frame.
- Insulate the opening: Protect your garden shed from chilly winds and frigid temperatures by applying foam insulation to the window opening. Ensure that each gap is filled, so no drafts can penetrate, making the area comfortable all year round.
- Check the level: To ensure the window opening is even and straight, utilise a group. Make whatever adjustments you need until that space is perfectly balanced and vertical.
- Painting: If you fancy, you can also paint your windows if you want to go for more fresher look.
Could you align the window opening: To ensure a perfect fit, adjust the window opening until it is properly lined up with its corresponding frame. Once the alignment is done, your window will be placed.

Install New Windows
After the window openings have been prepped, it’s time to introduce your new windows. An accurate fit and firm installation depend on meticulousness in this process step. To guarantee a successful outcome, follow this comprehensive guide for installing those brand-new windows:
- Fit the windows into the openings: Securely insert them into their respective slots, and ensure they are level. Once you have fitted them in, use shims to adjust until the window is levelled perfectly.
- Secure the windows in place: Installing the windows is simple – use screws that fit perfectly with your window and frame. Before securing them, create pilot holes using a drill for added stability. This way, you can be sure that the windows will stay in place while providing an optimal level of security!
- Apply caulk: A bead of caulk around the window frame is essential to keep your garden shed warm and guard against chilly drafts. This will create an airtight seal that keeps cool air out, resulting in greater comfort for you!
- Install trim (optional): To create a finished, polished look for your window, consider adding trim to its edges. Utilise a saw to cut the frame down and finish nails to secure it in place steadfastly – now’s the time!
Finish and Clean Up
You’re almost done with your window installation project! All that’s left is to add the finishing touches, tidy up any mess, and ensure everything looks perfect. Here are a few simple steps for you to follow to complete this task quickly:
- Apply trim: Now is the perfect time to get trimming! Utilising a saw, cut it down to size and then use finishing nails for guaranteed security.
- Apply caulk: To provide a secure closure, spread a final layer of caulk around the edges of your trim and window frame. This will effectively ward off strong winds while insulating your garden shed.
- Clean up debris: To ensure the installation area is sparkling clean, thoroughly sweep away any sawdust or dirt with a broom or vacuum cleaner. This will ensure your space looks neaneatter the job.
Following the steps below, you can quickly finish window installation in your garden shed. The final touches will ensure that everything is stable, tidy and complete — enabling you to sit back and appreciate your newly installed windows! They provide natural light & fresh air and make for a much more inviting workspace. Should any queries or issues arise during the process, don’t hesitate to look towards professional assistance for help!
All in All
Bringing natural light and fresh air into your garden shed can transform the workspace! Enjoy creating a cheerful and inviting space! To help you out, here are some easy Feel free to steps for installing new windows; s in no your if these tips helped or share any of your own experiences with window installation below.
Thanks for reading!
I hope that was helpful.
Dale
Duramax Plastic Shed 10x8
9.2
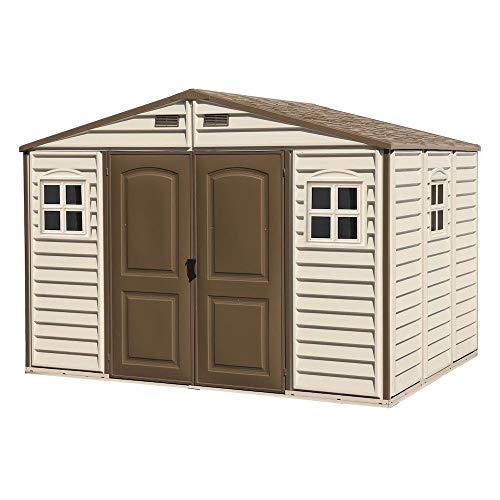
Best 10x8 shed I had a chance to review.
Hey, I’m Dale, I live in Scottish Highlands with my family where we looks after our farm and do some DIY projects together with my two sons.
I love to share my knowledge about putting up sheds (I owned 3 already and helped all my pals with theirs). Hope you find my writing helpful.