
How to make a garden shed out of pallets
If you not fancy already build shed, in this guide, I will lead the way to construct a garden shed out of pallets.
Pallets are incredibly useful and create abundant opportunities – building a shed is just one example!
They make it more cost-effective and allow aspiring craftspeople with experience to dive right into construction.
From gathering materials needed to adding finishing touches, I’m here every step of the journey. So grab your toolbox, and let’s get started!

Gathering Materials
Before constructing your garden shed from pallets, gather the essential materials for this do-it-yourself undertaking. Don’t worry – collecting these items is a breeze! Here’s what you’ll need:
- Pallets – The amount of pallets you need depends on your shed size. When designing your plans, allocate six per wall and two to three for the roofing structure.
- Tools – To assemble the shed, you’ll need a saw, drill, hammer and screws or nails. Additionally, you might require a crowbar or pry bar to take apart your pallets for wood material.
- Optional Extras – Consider adding roofing materials like shingles or corrugated metal to make your shed weatherproof. Adding a door and windows can also provide better protection against the elements while providing greater flexibility regarding usage and design. Whichever route you choose, rest assured that your new shed will withstand whatever Mother Nature throws its way!
If you need pallets for your upcoming project, there are numerous possibilities to consider. For example, try contacting local companies and asking if they have spare pallets that could be reused. Additionally, browse available Craigslist or Facebook Marketplace listings for potential leads.
Moreover, it is also possible to find free pallets in industrial areas or even alongside roads – make sure each piece has been examined thoroughly before usage, as worn-out components may not provide adequate stability once incorporated into the shed’s design!
Preparing the Site
Before you get to the fun part of building your garden shed, please ensure the site where you plan to construct it is properly prepped. This step provides a stable and sturdy structure, so please look at this crucial task! Here are a few tips for preparing an ideal space:
- Choose a level area -Before beginning construction, opt for a levelled terrain on which your shed will be built. Only some land can prove problematic for the shed’s levelling and cause future structural issues.
- Clear the area – Before starting your shed construction, ensure the area is clear of any rocks, debris or other obstructions that may hinder progress. Also, could you level the ground where it will be erected for a secure and sturdy structure?
- Lay a foundation -A foundation is essential to ensure the strength and stability of your shed. You can construct one easily using paving stones, concrete blocks or a lightweight wooden frame. Depending on its size, the type of material you use will vary accordingly to support the structure’s weight.
- Ensure proper drainage – To guarantee optimal protection for your shed, it is paramount to ensure the area beneath has adequate drainage. If necessary, you could construct a ditch or add gravel to facilitate water runoff.
If you take the necessary steps to construct your garden shed properly, it will become a reliable and secure fixture that can give you years of satisfaction.

Building the Shed Frame
Would you be ready to start constructing the frame of your garden shed? As this is one of the main components that will support walls and roofing, it’s essential to follow these steps carefully:
- Lay out the pallets -Meticulously assemble the pallets, forming them into your desired shed shape. Use a carpenter’s square and a leveller to ensure accuracy when measuring for straightness and alignment before continuing with construction.
- Secure the pallets – To ensure your frame remains sturdily built, use robust screws or nails when fastening the pieces together. This will guarantee that everything is held securely in place.
- Add support beams -To ensure utmost stability, you should secure intense support beams along the sides and roof of your shed. Through simple screws or nails, these beams can easily be attached to the frame’s structure.
- Cut and shape the pallets – To create the perfect outdoor storage space, you may need to adjust some pallets according to the size and shape of your shed. Use a saw for precise cutting and then use a sander for any uneven edges that arise from this. In no time, you will have an optimally fitted shed with plenty of room for whatever you want to store!
Constructing a sturdy and dependable frame for your garden shed can be completed in only a few short steps. Once the framework is created, you can add the walls and roofing to complete it.
Adding Walls and Roof
Congratulations! You have successfully constructed the frame of your garden shed and are now ready to begin adding walls and a roof. Here’s how it’s done:
- Attach the pallets – Securely attach pallets to the frame of your shed by using screws or nails. You may utilise metal brackets for extra reinforcement, ensuring each wall is level and square as construction progresses.
- Add support beams – Secure the walls with supporting beams along the top to reinforce them and guarantee a sturdier roof. The frame can be fixed in place by either screws or nails.
- Install the roof – To set up the roof corrupt, start by arranging your pallets into a shape that reflects the final design of the top. Please ensure they are balanced and lined up in perfect squares, so everything stays stable while installing. You can then attach metal brackets onto their respective support beams to secure them. Once done, add weatherproofing components like shingles or corrugated metal sheets for excellent protection from inclement conditions.
- Cut and shape the pallets -When constructing your shed, you may require customising the pallets to achieve a precise fit. You can use a saw and sander for cutting and smoothing out any unpleasant edges along the way.
By executing these easy steps, you can construct a weatherproof, resilient garden shed out of pallets. Once the walls and roof are in place, it’s time to enhance your design with delightful accents such as windows or doors!
Finishing Touches
Now that you have erected the framework of your garden shed, it’s time to give it a personal touch! Use these ideas as inspiration for transforming your outdoor structure into something both functional and stylish:
- Sand and paint the shed – After the shed is complete, sand any bumpy edges or surfaces and coat with paint or stain to keep moisture from seeping through. Not only will this preserve the wood, but it will also give your shed a professionally finished look.
- Add windows – Let in the sunshine by incorporating windows into your shed – you can use previously owned or custom-made ones with Plexiglas or transparent plastic.
- Install a door – Complete the look of your shed with a door and make it more secure. Add an extra touch using repurposed doors, or build one yourself from pallets for a unique design!
- Add shelving or storage – Transform your shed into an efficient and organised space by adding shelves or storage. Create custom wooden shelving with salvaged wood, or use pallets to build a frame. You can also install hooks on the wall for hanging tools, garden equipment, and other items that need to be stored out of the way but are easily accessible when needed.
To create a garden shed that is both aesthetically pleasing and practical, add some of your personal touches! With creativity and DIY expertise, you can make it the focal point of your outdoor space – something to be proud of.
All in All
All in all, constructing a garden shed out of pallets is an enjoyable and fruitful DIY project that can be easily managed by gardening fanatics regardless of their experience level. If you adhere to the steps elucidated here, you will have created a durable, weatherproof haven that adds both functionality and elegance to your outdoor area.
Whether it’s employed for stocking tools or sowing seeds or just as tranquil hideaway where you can take pleasure in your yard-work; this new shed will surely prove itself invaluable! So buckle up those sleeves, gather all necessary materials and get ready to fashion yourself an incredible structure worthy of admiration!
Duramax Plastic Shed 10x8
9.2
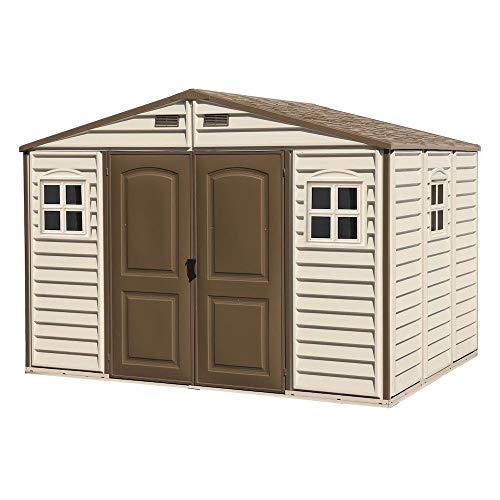
Best 10x8 shed I had a chance to review.
Hey, I’m Dale, I live in Scottish Highlands with my family where we looks after our farm and do some DIY projects together with my two sons.
I love to share my knowledge about putting up sheds (I owned 3 already and helped all my pals with theirs). Hope you find my writing helpful.